0 comments Wednesday, November 25, 2009

Our fourth week of planting


Fig1. Week 4. Actual digester


Fig 2. Actual digester


Fig 3. Week 2. Prototype run 1


Fig4. Week 2. Prototype week 2


Fig5. Week.1 Commerical

0 comments Friday, November 20, 2009

Third week of our planting.


Fig1. Week 3. Actual Digester


Fig 2. Week 3. Actual Digester


Fig 3. Week 2. Prototype run 1


Fig 4. Week 1. Prototype run 2

0 comments Tuesday, November 17, 2009

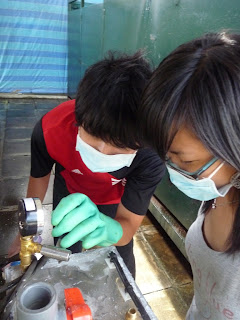
During our course of our 1st prototype run, we had begun to notice the flaws in the material and the job done on the prototype. This eventually led to undesired consequences and interruptions within the 20 day run.


Fig 1: Burnt front section of the prototype


Fig 2: Close up view of the burnt prototype


Fig 3: Melted tube that valve was connected to.
From our observation, it would seem that the tube that the valve was connected to was not of the appropriate material, hence it could not withstand the high temperature and as a result, melted.


Fig 4: Another view of the melted, burnt section of the tube.
As seen from the picture, there are the melted remnants of the plastic. The black colour however is the result of the glass silicone used to prevent leakage in the aerobic stage.

The melted pipe had caused major leakage of the samples, leading to a partial failure of the aerobic stage. However, we made do with the remaining sample that was still present in the chamber for sampling tests to be carried out on.

From this experience, we realised that the material used was unsuitable due to the multiple leakages that are not only hard to identify, but also hard to repair. This makes it very troublesome for the experimental run and also ended up messing up the entire area. Therefore, we decided to quickly reconstruct the prototype using a different material which is metal. Since metal uses welding, and is able withstand high temperatures, therefore we would have less problems. The update on the new prototype will be present in a different post.

0 comments Monday, November 16, 2009

Gas Test Checking
Before conducting the aerobic digestion run, we had to do a gas check first.

1. Close V7 to prevent any more gas from entering the methane capture system.
2. Insert the Drager tube into the gas test socket.
3. Ensure V4 is open.
4. Open V5 to allow the gas to fill up the gas test socket.
5. Drag the tube using the Drager pump to measure the concentration of gases inside
6. Close V5 after measurement is obtained.


Fig 1: Far right: Drager Pump, Far left: the gas test socket.


Fig2: Carbon Dioxide Drager Tube
We observed changes in colour near the tip of the drager tube as observed


Fig 3: Hydrogen Sulphide Drager Tube. There is a very dark noticeable colour change observed.


Fig 4: Qualitative testing of methane using Drager tube and pump

Fig 5: There is some colour change (greenish faint colour) Methane presence is proven

After the gas test checking, we proceeded to conduct the Aerobic Digestion. The procedures performed by us are as follows

Aerobic Digestion
Before conducting the aerobic stage, We ensured that the valves leading to the 1st chamber (Anaerobic stage) are closed. They are V1, V2, V4, V5, V6, V7, and V8.
1. Crack open vent valve V9 to allow natural atmospheric balance for digesting, the close it. Open V10 slightly then fully to measure the pressure of the system.
2. Open V11 and run Fish Tank Pump to allow aeration.
3. Start Heating Coil and maintain at 60oC by Thermostat control
4. Manually stir the sludge in the 2nd chamber
5. Leave sludge for approximately 10 days
6. After the completion of the process, collect sample by opening V3 and closing it after all the sludge has dropped into the bottom containment.
7. Stop Fish tank pump, Heating Coil, thermostat control.
8. Close all valves and perform housekeeping


Fig 1: The transferrence of the sludge from the 1st stage to the 2nd stage


Figure 2: leaking methane capture system

As observed, the waste had become more liquid, and the solids have disintegrated into the surrounding liquid. The colour of the waste mixture had also changed from a darker brown to a lighter brown. Even though still rather smelly, the smell seemed less pungent.

For this run, it was much better than the loading as all the waste had been contained. But problems on the digester prototype started to appear to us during our transferrence of sludge to the 2nd chamber below. As seen from Fig 6, there is leakages at the middle tube between the two chambers. The side and bottom of the 2nd chamber also started to leak as the level of the waste in the 2nd chamber increased. Immediately, we asked for some of the technicians to come down to rectify the problem. The problem was assumed recitified for that day after the technicians had sealed it with a different silicon, and the leaks seemed to have stopped.

0 comments Friday, November 6, 2009

Our Second week of plant growth


Fig1. Week 2. Actual digester sample


Fig2.  Week 2. Actual digester


Fig3. Week 1. Prototype run 1

0 comments Wednesday, November 4, 2009

COLLECTION OF WASTE


Fig 1: Our group members were well equipped with gas masks.


Fig 2: Carrying of buckets and containers filled with waste to an appropriate location for mixing.

EXPERIMENTAL RUN 1

The procedures for the experimental run on the prototype were developed weeks ahead and are as follows:

Anaerobic Digestion


1. Collect sample of the raw sludge before loading.
2. Ensure that all valves are closed.
3. Load sludge through the loading port and open V1 to allow sludge to enter the 1st Chamber and close V1 after loading is completed.
4. Open V8 to allow any liquid to be drained from the 1st chamber towards the liquid drain.
5. Ensure that there is a container at the other side of the filter to collect the filtrate.
6. Ensure that the tubing connecting the methane capture system and digester between V12 and V7 is connected.
7. Open V12 and V7 to allow gases to pass through to the methane capture system.
8. Stir the sludge in the chamber manually to ensure even mixing.
9. Open V4 slightly first then fully to measure the pressure using the pressure gauge attached.
10. Leave the system to run for approximately 10 days


Fig 1: Ensuring that all valves are are closed again after loading.


Fig 2: Checking all instrumentations once again after loading.


Fig 3: Freshly loaded sludge in the Anaerobic Chamber.


Fig 4: Close up view of loaded sludge


Fig 5: Prototype covered with a thick black cloth to simulate the same surroundings as that in the actual closed up digester.

For this run, we experienced many setbacks due to the delay of the completion of the prototype. The group had decided to use fresh sludge because the sludge collected and accumulated from the farm's toilet might have been pre-digested prior to the experiment, giving rise to inaccurate results. As the run had to be quickly started, it was even harder for us to collect fresh human waste. There were much unwillingness among many whom we pleaded with, largely due to embarrassment and the unethical, controversial aspect of our project which requires fresh collection of human waste. However, we managed to find volunteers that were willing to contribute to our experimental run and whom we are extremely grateful to. To spur on the collection, the group bought Yakult and Bananas, food etc to feed the volunteers. After which, equipped with masks and chemical gloves, we mixed the waste together in a ventilated area with a long pole in a bucket, at the same time diluting the mixture with toilet water.

Reflection: The loading was an extremely challenging and nightmarish experience. Despite doing it in an open area, the smell issuing from the bucket of waste was nauseating and ghoulish. Even with masks, we could still inhale the autrocious smell. The apparatus supplied to us to aid us in the loading were inadequate in quality. The scoop to transfer the waste from the bucket slowly to the loading port was cracked and giving way and the funnel used to channel the waste into the port was cracked at the edge. Hence the waste liquid spurted from the cracks and caused much spillages. It was already tough avoiding the spillages and small splashes of waste leaking from the cracked apparatus, but worse was to come when the relatively solid waste caused clogging at the loading port. One of our group members had to reach in through the funnel and jab the solid waste through the loading port. Swarms of flies came within seconds of our loading and added to the frustration. Despite losses, we were still able to obtain the volume specified before. After the loading, we proceeded to wash up the entire area, leaving no drops of waste on the prototype and the ground and lastly with a touch of air refresheners. Despite the many obstacles, we were able to bear through the loading and successfully start the anaerobic stage. This experience has led us to plan a better way of loading the waste for the subsequent run.